
Autodesk Flame
Flame hands its picture to OBS Studio over NDI, and OBS sends it to Pixelview, with no capture device needed.
Good for trying Pixelview, not for final review
Flame's NDI output has lower resolution and heavier compression than its SDI output. For client sessions, stream the SDI output with Pixelview Desktop, OBS Studio and a capture device, or a hardware encoder. See Choose How to Stream.
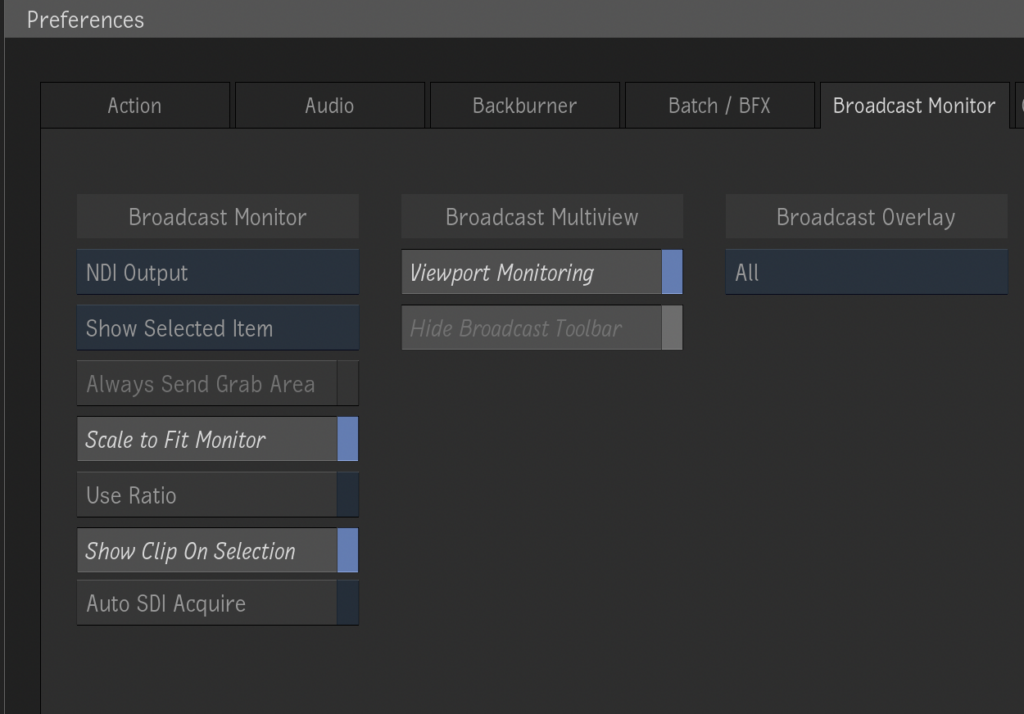
1. Turn on NDI output in Flame
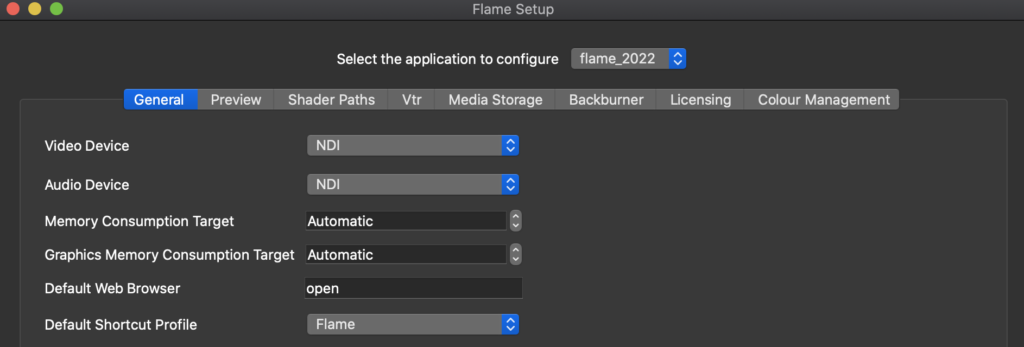
In Setup and Preferences, set NDI as your video and audio output.
2. Install the software
- Install OBS Studio.
- Close OBS, then install the NDI plugin for OBS (DistroAV) for your operating system.
- Install NDI Tools.
3. Pick up Flame's output
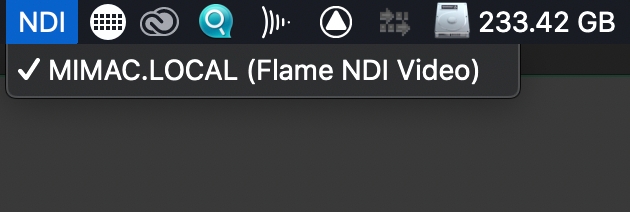
Open NDI Virtual Input from your Applications folder, click the NDI icon in the menu bar, and choose your Flame output.
4. Receive it in OBS
Under Sources, click +, choose NDI Source, and select your Flame output.
5. Stream to Pixelview
- Follow Connect OBS to Pixelview to paste the Server and Bearer Token from Admin.
- Use the recommended quality values in OBS Studio Setup.
- Click Start Streaming and check the thumbnail in Admin.
- Open the viewer link to check picture and sound, then invite your viewers. See Watch in a Web Browser.
Need help? Email hello@pixelview.io.